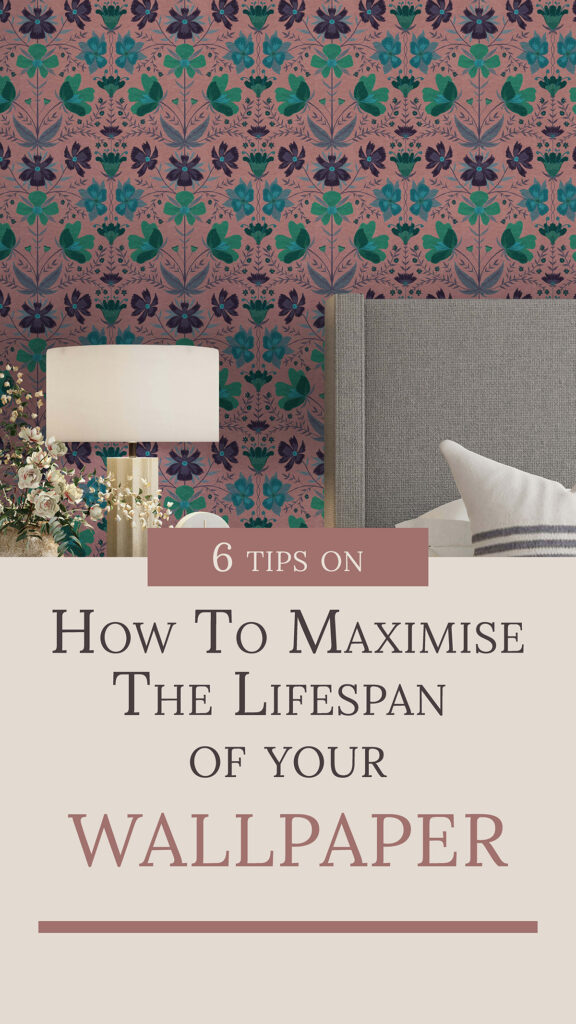
When it comes to home décor, wallpaper is a popular choice for adding personality and style to any room. Unlike paint, which often requires frequent touch-ups and complete reapplications, wallpaper can provide a long-lasting and durable finish. However, the longevity of your wallpaper largely depends on various factors including the type of wallpaper substrate, installation methods, the room it’s placed in, and how you look after it. In this blog post, we will explore how you can maximise the lifespan of your wallpaper and keep it looking fresh and new by considering six key aspects.
1. Different Types of Wallpaper Substrates
Wallpaper substrates refer to the material on which the design is printed. The substrate you choose will significantly affect the durability and longevity of your wallpaper, as each type suits different applications and environments.
Traditional Paste and Stick Wallpaper (Unpasted):
Traditional unpasted wallpaper requires the application of a separate adhesive before installation. This type of wallpaper is often available in various textures such as canvas, crosshatch, smooth paper finishes, leather texture, and stucco, to name a few. These textures not only add a tactile element to the wallpaper but also make it suitable for different settings. For example, a canvas texture is ideal for high-traffic areas due to its resistance to scratches, while a smooth paper finish is more suitable for low-traffic areas.
Peel and Stick Wallpaper (Self-Adhesive/Pre-Pasted):
Peel and stick wallpaper, also known as self-adhesive or pre-pasted wallpaper, is an easy option for a DIY installation. This type is ideal for renters or those who like to frequently change their décor. However, the lifespan of this wallpaper can be less compared to the traditional type.
Choosing the Right Substrate to Maximise the Lifespan of your Wallpaper:
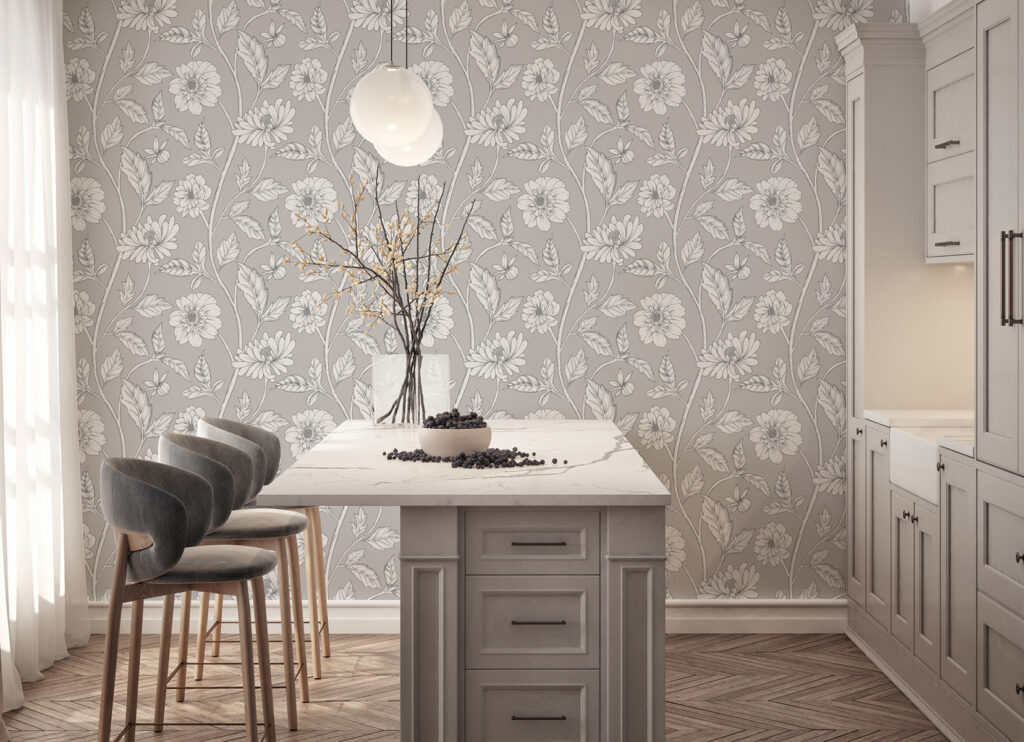
Different substrates perform better in different settings. For example, paper finish or non PVC-backed wallpaper is not suitable for bathrooms due to its susceptibility to steam and moisture. In contrast, laminated or PVC-based wallpapers are better suited for bathrooms and kitchens as they offer more resistance to water and humidity. Similarly, textured wallpapers, such as canvas or stucco, are more durable in high-traffic areas.
If you want to maximise the lifespan of your wallpaper it is important to carefully select the appropriate wallpaper substrate for each room. This will ensure a longer lasting installation for your walls. We will discuss more on this topic in section 3.
2. How Are You Installing Your Wallpaper?
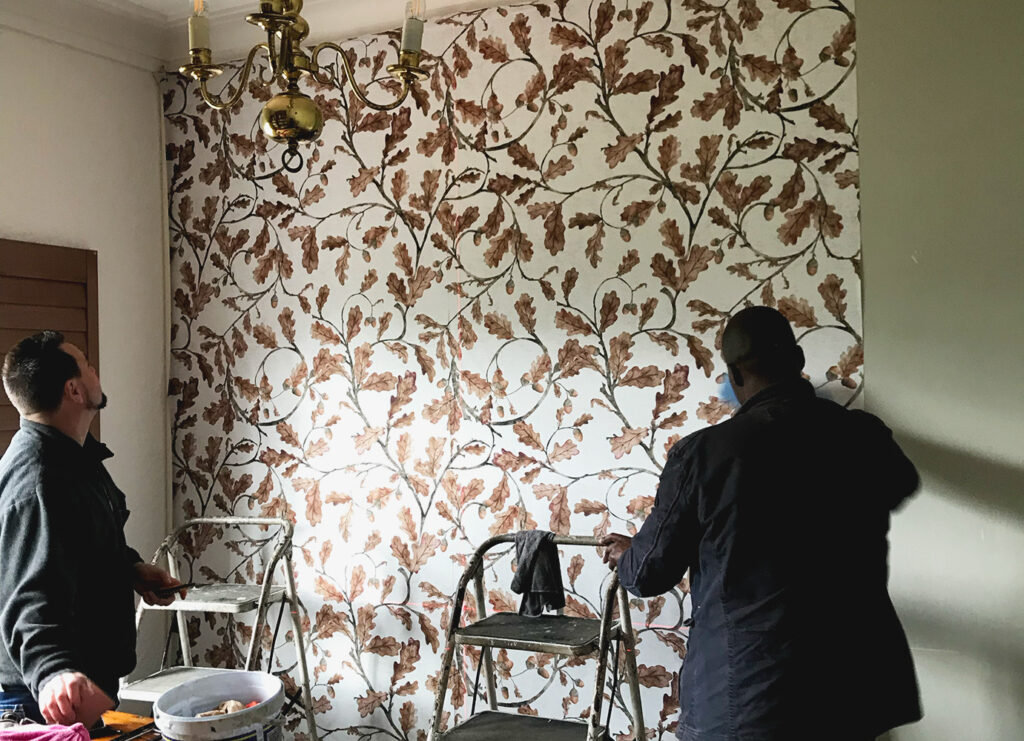
Your method of installation plays a key role in determining the longevity of your wallpaper. Whether you opt for a DIY approach or hire a professional team, the quality of installation will significantly impact how long the wallpaper lasts.
DIY vs. Professional Installation:
Installing wallpaper yourself can be a rewarding experience and can save money on labor costs. Many peel-and-stick wallpapers are designed with DIY enthusiasts in mind, making them easy to apply. However, DIY installations come with the risk of improper application, which can lead to peeling, bubbling, and uneven adhesion, ultimately shortening the lifespan of the wallpaper.
On the other hand, professional installers bring expertise and experience to the table. They can ensure that the wallpaper is applied correctly, using the right techniques and tools, which will result in a more durable and long-lasting finish. A professional team can also handle the more challenging aspects of wallpaper installation, such as matching patterns at seams and dealing with tricky corners and edges.
Choosing the Right Adhesive:
The type of adhesive used is another crucial factor. A strong adhesive ensures that the wallpaper sticks properly and remains in place for many years. The manner in which the adhesive is applied will depend on the type of wallpaper substrate. For example, wallpapers with a paper backing typically require the adhesive to be applied to the wallpaper itself, while those with a PVC backing may need the adhesive to be applied directly to the wall.
Ensuring that you use the correct adhesive and application method will help prevent issues such as peeling and bubbling, allowing you to properly maximise the lifespan of your wallpaper.
Different environments present their own challenges and unique requirements. Choosing the right type of substrate for each room is essential to maximise the lifespan of your wallpaper.
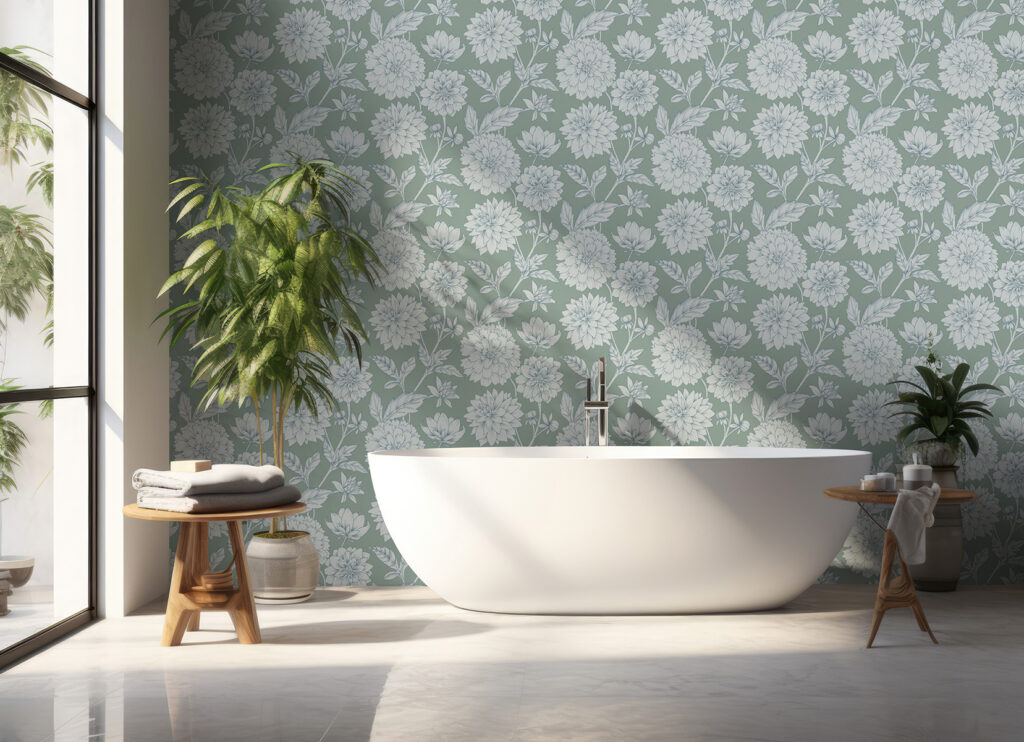
Bathrooms and Kitchens:
These areas are typically high in humidity and prone to splashes and spills. For these spaces, it’s best to choose a PVC based wallpaper or one with a laminated finish that can withstand moisture and steam. Traditional paper-backed wallpaper is not ideal for bathrooms or kitchens, as it can absorb moisture and start to peel or develop mould over time.
Living Areas, Bedrooms, and Low-Traffic Areas:
For living rooms, bedrooms, and other low-traffic areas, a paper finish wallpaper can be a great choice. These rooms generally experience less wear and tear, so the wallpaper is less likely to be damaged.
High-Traffic Areas:
Hallways, entryways, and children’s rooms are high-traffic areas that require durable wallpaper. Textured wallpapers such as canvas or stucco are ideal for these spaces, as they are more resistant to scratches and scuffs. Textured wallpapers can also hide minor imperfections that might occur over time.
Corners and Edges:
Corners and edges are more susceptible to peeling and damage, especially in high-traffic areas. Using a textured wallpaper in these spots can help mask any potential wear and tear. A professional installation is advised when dealing with tricky spaces such as this if you are wanting to maximise the lifespan of your wallpaper.
By carefully considering the challenges and environment of each room, you can easily succeed in choosing the right wallpaper that not only enhances the room’s décor but also stands the test of time.
4. Longevity of Wallpaper vs. Paint
When comparing wallpaper and paint, both have their pros and cons, but in terms of longevity, wallpaper often comes out ahead. Here’s why:
Durability: Wallpaper can last significantly longer than paint, when the appropriate substate is installed correctly. High-quality wallpaper can endure for 15 years or more, whereas painted walls typically need to be touched up or completely repainted every 5 years or so. This makes wallpaper a more durable and long-lasting option.
Cost-Effectiveness: Although the initial cost of wallpapering a room can be higher than painting, the long-term benefits often make it the more economical choice. With paint, the cost of frequent touch-ups and repainting adds up over time. Wallpaper, on the other hand, requires minimal maintenance, and when chosen and installed properly, can remain in excellent condition for many years, making it a more cost-effective option in the long run.
Maintenance: It is generally easier to maximise the lifespan of wallpaper than it is paint. It can be gently cleaned with a soft cloth and mild detergent, whereas painted walls may require more frequent cleaning and are more prone to showing dirt and scuffs. High-quality wallpapers, especially those with protective coatings, are designed to resist stains and are easier to wipe clean without damaging the surface.
Aesthetic Appeal: Wallpaper offers a wide range of designs, textures, and finishes that paint cannot match. This versatility allows homeowners to create unique and personalised spaces that reflect their style. Moreover, wallpaper can add depth and dimension to a room, which is often challenging to achieve with paint alone.
In summary, while paint may seem like a simpler and cheaper option initially, wallpaper offers superior longevity, durability, and cost-effectiveness, making it a worthwhile investment for homeowners looking to enhance their living spaces.
5. How to Choose the Right Wallpaper Design Without Getting Tired of It
Choosing wallpaper can be daunting, especially if you’re worried about growing tired of your choice over time. However, there are strategies to help you select a wallpaper that will remain visually appealing for many years to come.
Match Your Home’s Aesthetic:
Start by considering the overall aesthetic of your home. Choose wallpaper colours and designs that complement the existing colour palette and style of your space. This cohesive look will help ensure that the wallpaper enhances rather than clashes with your décor.
Personal Preference Over Trends:
While it’s tempting to follow the latest trends, it’s essential to choose a wallpaper design and colour that you genuinely like. Trends come and go, but your personal preferences are more likely to stand the test of time. Opt for designs and colours that resonate with you and fit your style.
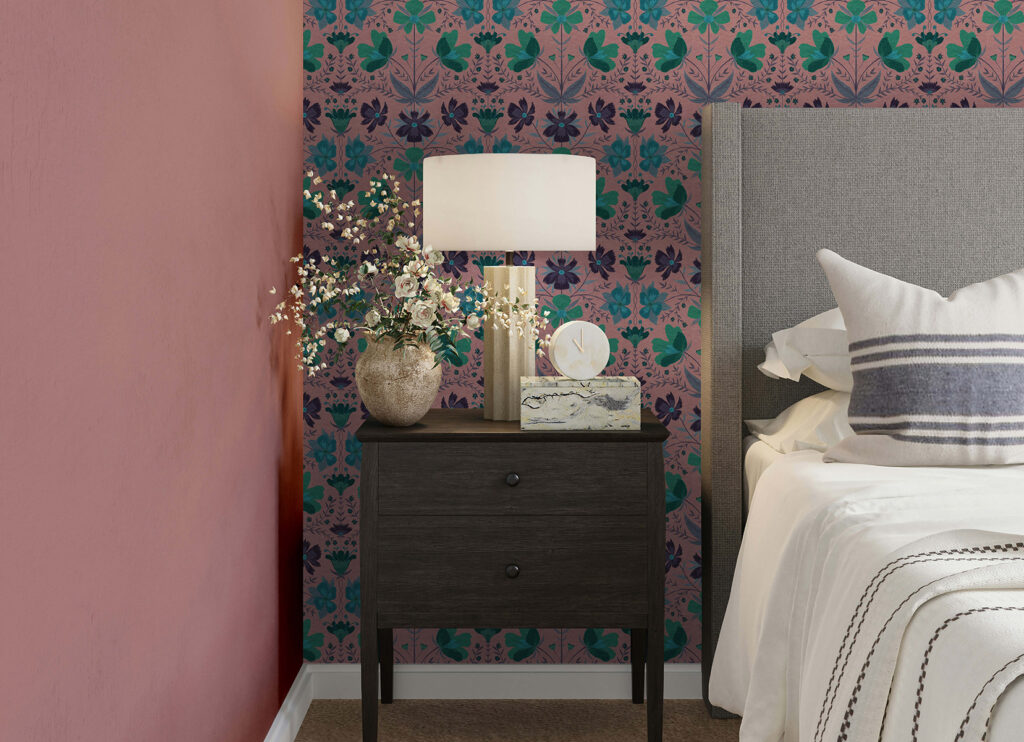
Subtle and Understated Choices:
If you’re not accustomed to bold décor choices, start with something more subtle. Neutral or muted colour palettes can provide a visually pleasing effect without being overwhelming. These choices are less likely to become tiresome and can serve as a versatile backdrop for various interior styles.
Consider the Room and Location:
Choose a wallpaper design that suits the room it will be installed in. For example, if you are wallpapering your study don’t choose a food inspired design – save that for the kitchen or dining room. A study may require a more serene and sophisticated option. The wallpaper should reflect the room’s purpose and enhance its ambiance. Additionally, it is also important to consider the location of your home. For instance an ocean-themed wallpaper might be perfect for a house along the coast.
Accent with Décor Accessories:
If you’re worried about committing to a specific colour or design, choose a neutral wallpaper and use accessories to add pops of colour. For instance, a beige wallpaper can be accented with colourful cushions, artwork, and other décor items. This approach allows you to change the room’s look easily by updating the accessories rather than the wallpaper.
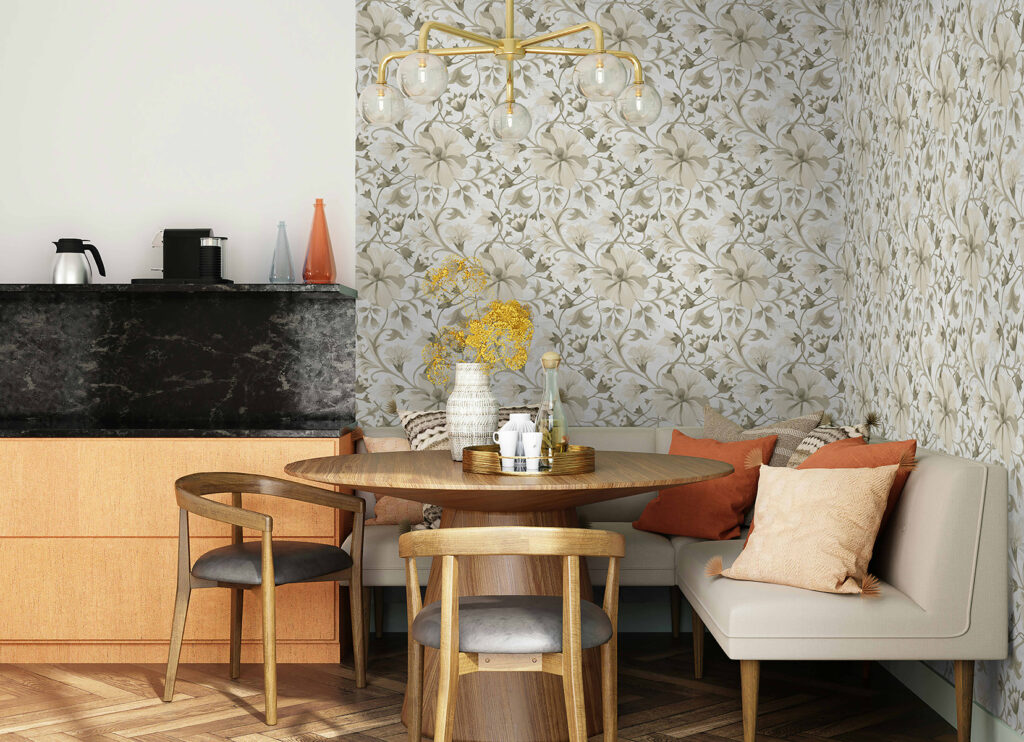
Classic and Timeless Designs:
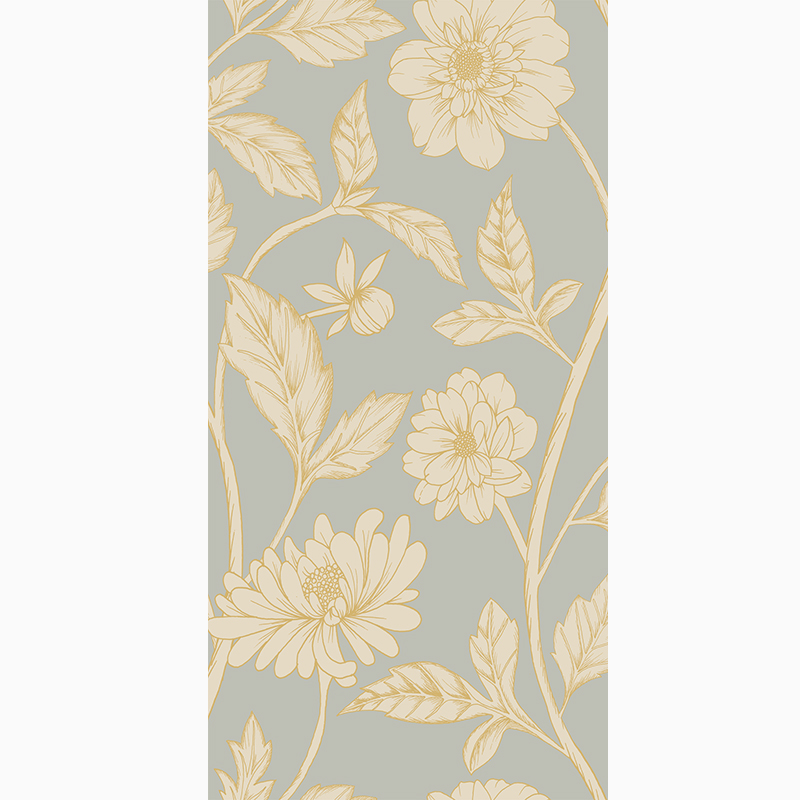
Opt for classic and timeless wallpaper designs that won’t go out of style. Patterns such as stripes and florals often have long-lasting appeal. These choices can provide a sophisticated look that won’t feel outdated after a few years.
By carefully considering these factors, you can easily maximise the lifespan of your wallpaper by choosing designs that you’ll love for years to come, making it a worthwhile and lasting addition to your home.
6. How to Look After Your Wallpaper and Keep It Clean
Proper maintenance is crucial for extending the life of your wallpaper. With the right care, you can keep your wallpaper looking fresh and beautiful for many years to come.
Gentle Cleaning: The best way to clean your wallpaper is by gently wiping it with a soft, dry cloth or a microfiber cloth. For stubborn spots, use a lightly dampened cloth with lukewarm water and mild detergent, avoiding abrasive materials. Gently wipe the wallpaper, taking care not to oversaturate it. Immediately follow with a dry cloth to remove any excess moisture. This method helps to remove dirt and stains without causing damage.
Avoid Scrubbing: Never scrub your wallpaper, as this can lead to the loss of ink and damage the surface. Scrubbing can also cause the wallpaper to peel and scratch, reducing its longevity. Always use gentle wiping motions to clean the wallpaper.
Regular Dusting: Regular dusting can help keep your wallpaper looking new. Use a soft, dry cloth or a duster to remove any dust that accumulates on the surface. This simple maintenance task can prevent dirt buildup and keep the wallpaper fresh.
Protect from Sunlight: Exposure to direct sunlight can cause wallpaper colours to fade over time. To prevent this, consider using curtains or blinds to protect your wallpaper from prolonged sun exposure. UV-protective window film can also be an effective solution for reducing the impact of sunlight on your wallpaper.
By following these care and maintenance tips, you can maximise the lifespan of your wallpaper by ensuring it remains in excellent condition, enhancing the beauty of your home for many years to come.
Summary of How to Maximise the Lifespan of your Wallpaper
In conclusion, the longevity of your home’s wallpaper depends on several factors including the type of substrate, installation method, the room it’s placed in, design choice and how well it’s cared for. By choosing the right wallpaper for each space, ensuring a quality installation, and following proper care guidelines, you can enjoy the aesthetic benefits and beauty of wallpaper for many years to come.
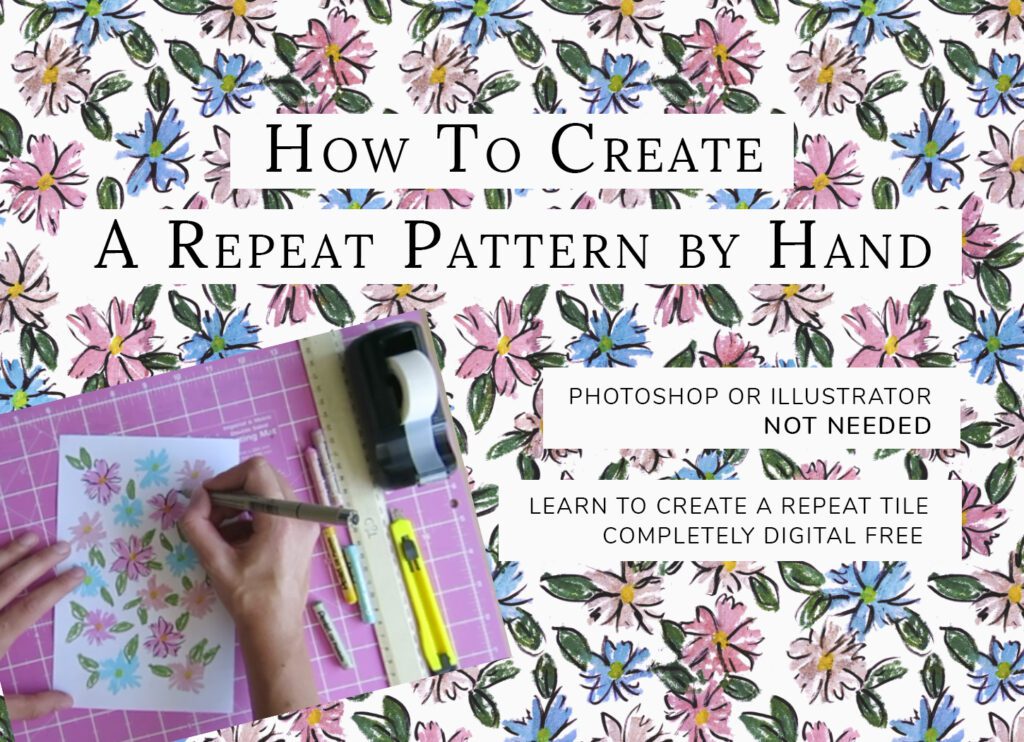
THROUGHOUT THIS POST, YOU WILL GAIN AN UNDERSTANDING OF WHAT EXACTLY A REPEAT PATTERN IS AND THREE VARIOUS FORMS IT CAN TAKE, AS WELL AS HOW YOU CAN CREATE YOUR VERY OWN STANDARD, REPEATING TILE – ENTIRELY DIGITAL FREE!
About two years ago, I was that person. I didn’t have any digital design tools that could help me with pattern creation, but I desperately wanted to start designing. So, I took to Google and started researching how to create repeat tiles entirely by hand. This became rather frustrating for me though because I struggled to find a decent tutorial that was simple and easy to follow. I came across very few resources that explained clearly how to make a repeat pattern without the need of any digital program to help. I spent hours trying to figure this out, and eventually came across one useful article that was able to point me in the right direction.
Given my own struggles in finding useful resources, this post serves as an outline to a simple, step-by-step process on how you can analogously create your own standard repeat tile, in the hopes that it will help. I also hope it will make the lives of those who are wanting to dive into the world of surface pattern design, but don’t have the electronic tools to do so, a lot easier.
The reason why I didn’t just go ahead and get illustrator to help with the design process when I first started was because I didn’t know if this was something that would stick. I didn’t want to pay for a subscription to something that could have just been a one-week hobby. Of course, now I use Illustrator and Photoshop to help me create new designs, but I can honestly say that I am so grateful I took the time to learn how to make repeat patterns by hand first. Doing this gave me an underlying foundation and understanding of how these patterns come together. When I use Photoshop or Illustrator now, I know exactly what is happening from a technical standpoint. So, I think this is a great starting point for beginning your journey as a pattern designer.
WHAT EXACTLY IS A REPEAT PATTERN?
Since you are probably new to pattern creation, I wanted to first outline what exactly a repeat pattern is.
At first, I was so confused about which pattern type to make and, moreover, what to Google to learn how to create it. I was at a loss for all the technical jargon involved with surface design. So, for those of you who are in a similar boat, here is a simple breakdown of what a pattern repeat is.
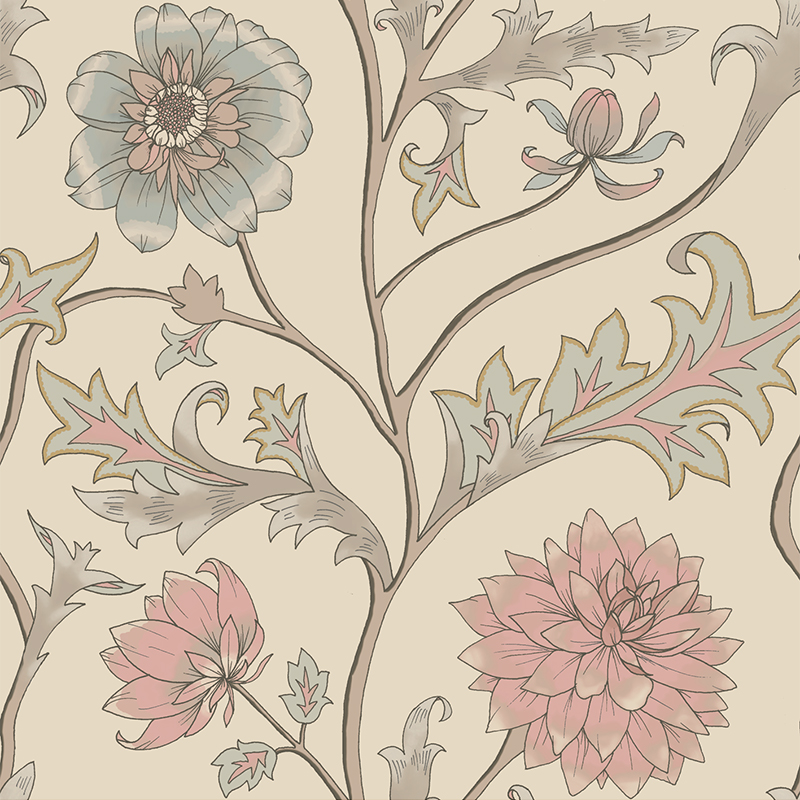
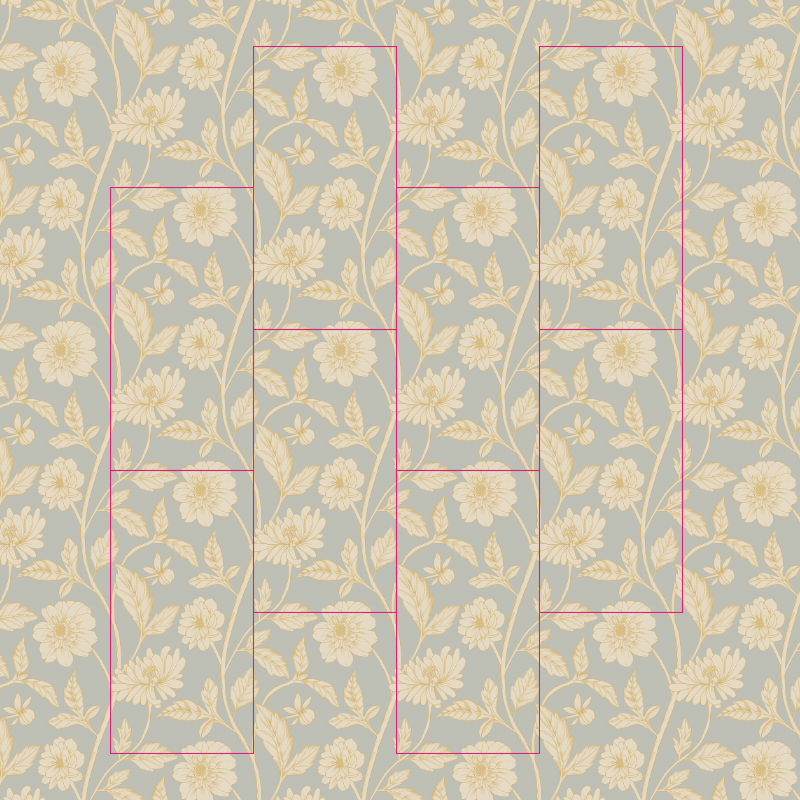
In a nutshell, a pattern repeat is when a rectangular or square block matches perfectly on all sides when repeated around all its sides. There is a seamless join when the blocks touch each other.
Now, there are many different types of repeat patterns one can create. Below is a list and explanation of three common types of repeating styles.
AN OVERVIEW OF VARIOUS PATTERN REPEATING STYLES
The Standard or Full Drop Repeat
The standard or full drop repeat is the type of pattern we are going to learn how to create in this post. This is probably the most basic and common form of pattern creation and is a great foundation to learn how to create when starting out in the world of pattern design.
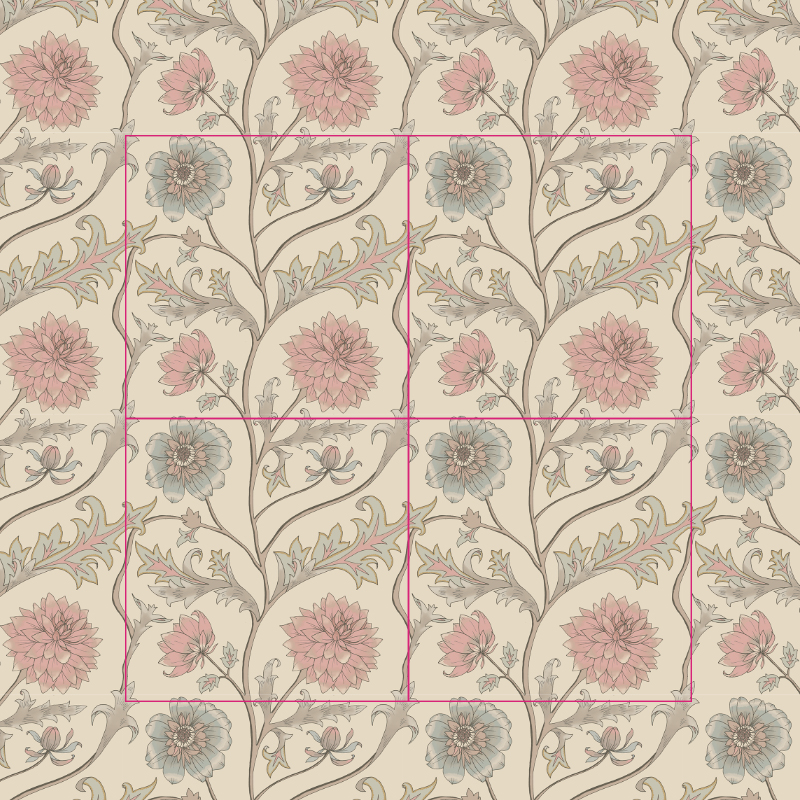
With this style, the elements are arranged in a regular and formal manner. The pattern is created by arranging the repeat tile directly above and below, as well as left and right of itself. See below for an example of this style in action.
The repeat tile (left) is perfectly repositioned above and below, as well as left and right of itself in order to create the full pattern (right).
We will get into the nitty gritty of how to perfectly match up each side of the tile in a moment.
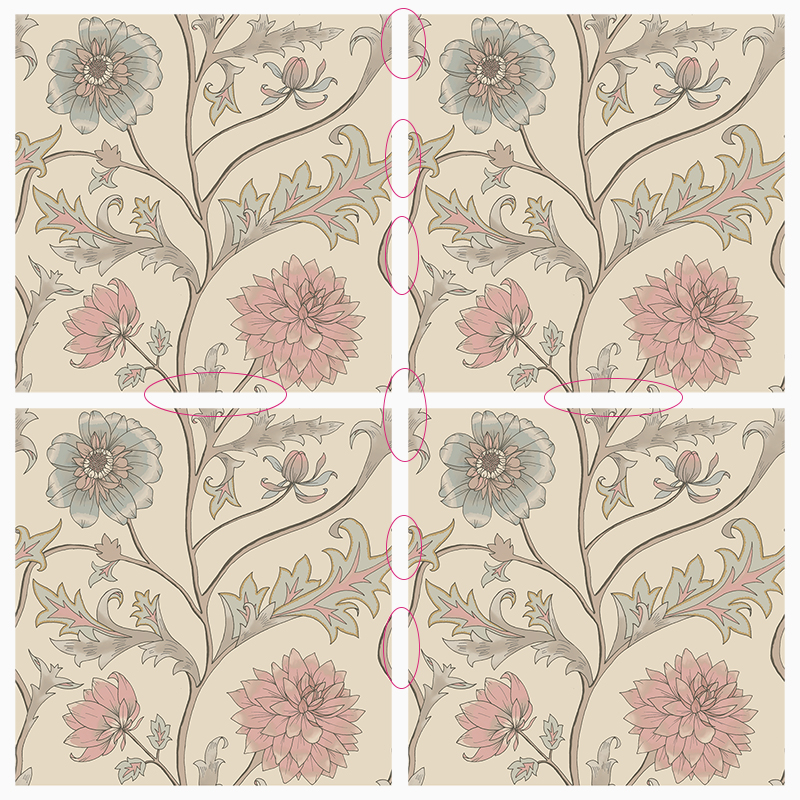
INDICATION OF THE SEAMLESS JOINS
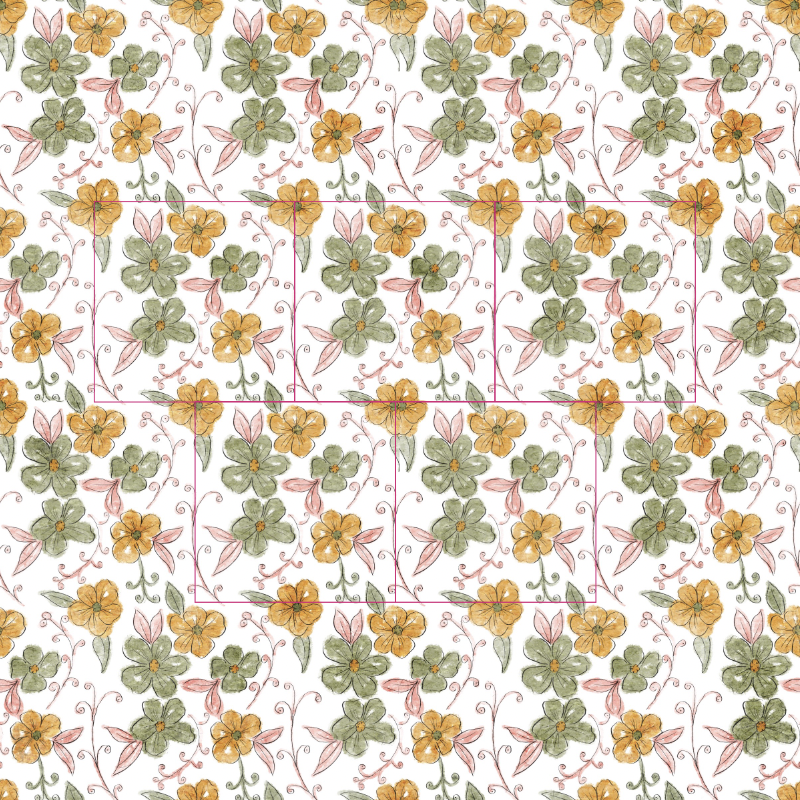
The Half Drop Repeat
The half drop repeat pattern is the second most common pattern you will find, and it’s one that I really enjoy using.
This is when the repeat tile is perfectly repeated above and below itself but drops halfway down on the left and right. I think the easiest way for one to understand this is to just show you.
As you can see from above, the half drop repeat tile (left) is perfectly repositioned above and below, but drops half way on the left and right.
There will be a tutorial coming soon on how to create this type of pattern.
The Brick Repeat Pattern
I personally haven’t explored this pattern style too much, but I think it’s a good one to know about as well. If you understand the half drop repeat, then this one will be straight forward to grasp as it is quite similar. With the half drop repeat the tiles are perfectly repeated above and below, and half dropped on the left and right. The brick repeat does the opposite. The repeat tile is perfectly aligned when repositioned on the left and right and does a half ‘shift’ above and below. (I don’t want to use the word ‘drop’ here because technically the pattern doesn’t drop down the page but rather shifts to the side). The below pattern illustrates this style.
So now that we have an overview of three different repeat pattern styles, let’s jump into creating your own standard repeat pattern.
The below tutorial will provide you with full proof steps on how to create your very own.
TOOLS NEEDED TO CREATE A SEAMLESS REPEAT PATTERN BY HAND
Paper (either a rectangle or a square – either will work)
Drawing mediums (pen, pencil, paint etc.)
Scissors / NT Cutter
Sticky tape
Ruler
STEPS TO DESIGNING A REPEAT PATTERN BY HAND
Using the drawing medium of your choice draw your first motif in the center of your page. Make sure you do not touch or cross over the edge of the page, as this will affect the seamless effect on your pattern.
Once you’ve drawn your first motif, turn the page over, and number each corner.
Then, using your ruler, mark a point at the center of each side. You can then join these points by creating a horizontal and vertical line.
Now for the scary part… take your scissors and cut the page in half along the lines. If you’re worried about messing up your motif with this step, it might be a good idea to photograph or scan it in before, while it is still intact.
For the next step, we are going to rearrange the pages. Make sure to cross-reference the corners of your page with mine as it is important not to get the placement muddled up. Swap side 1 and 4 with each other, and then side 2 and 3. Basically you need to swop the diagonally opposite corners with one another.
As soon as your pages are reordered tape your page up using the sticky tape.
You can now turn your page back over the right way. You’ll find that the main motif is now separated into the 4 corners of the page, and that the center of the page is blank. This is where you’ll draw your next motif – in the ‘new’ page center. Again, make sure that you do not draw over or touch the edges of the page when you draw.
When you are finished creating the second motif, turn your page back around and ‘unstitch’ the tape on the vertical line.
Now you are going to swap the vertical halves with one another. In other words, you need to swap side 2 and 4 with side 1 and 3.
As soon as the pattern is rearranged, you can stitch it back up and turn the page back around.
You can now fill in any gaps you feel are missing, but again making sure you do not cross over the edges.
When you are happy, turn the page round one last time, unstitch the horizontal line, and then replace the top half with the bottom half i.e., page 1 and 2 with page 3 and 4.
Tape it back up, turn the page over, and fill in any last gaps that you think are necessary.
You can keep repeating these steps as many times as you need to until you feel that the pattern is completed and that all the gaps are filled in.
And that’s it! Congratulations, you’ve officially created your very own standard repeat tile.
Now that you’ve completed your pattern tile, you may be wondering how you can see what it looks like as a full pattern. Well, I have a few tricks to share on this.
If you drew your pattern using pen or pencil, then you could trace it using tracing paper and then manually duplicate the tile on several different pages. This could be quite time consuming though, so if you are looking for a quicker solution, then the next few ideas might suit you better.
You could photocopy or scan the design. Or alternatively, you could take a photo of it using your phone (making sure to get the camera angle perfectly parallel to the artwork). Once you’ve scanned or photographed the design you can open it up on your computer and drop it into a Word or PowerPoint document, and then simply arrange the design in those programs to get an idea of how it will look. To do this you simply need to copy and paste the tile into position. Before I had photoshop, I used to do this quite often to get a visual idea of what I had created. This is also the method I used in the video tutorial below.
Some more creative ideas could be to carve the pattern out into vinyl or wood to create a pattern repeat stamp that can then be used on a multitude of surfaces. This will only really work with a simple pen or pencil drawing though.
You could lastly, take the tile and put it into a site like Spoonflower, which will automatically generate the full pattern for you. If you made it this far, congratulations! I hope you managed to create something beautiful using the steps above. By now you should have a good understanding of what exactly a repeat pattern is, knowledge of three various repeat styles, and the step-by-step process of how you can create your own standard repeat tile. I hope you’ve enjoyed following along and that you’ve been able to learn something new today.
This website uses cookies so that we can provide you with the best user experience possible. Cookie information is stored in your browser and performs functions such as recognising you when you return to our website and helping our team to understand which sections of the website you find most interesting and useful. Visit our privacy policy for more information.
Strictly Necessary Cookies
Strictly Necessary Cookie should be enabled at all times so that we can save your preferences for cookie settings.
If you disable this cookie, we will not be able to save your preferences. This means that every time you visit this website you will need to enable or disable cookies again.
3rd Party Cookies
This website uses Google Analytics to collect anonymous information such as the number of visitors to the site, and the most popular pages.
Keeping this cookie enabled helps us to improve our website.
Please enable Strictly Necessary Cookies first so that we can save your preferences!